How to Fill and Charge Yuasa YTX14-BS Motorcycle Battery
Fill and Charge a Motorcycle Battery
In most cases, the Yuasa YTX14-BS motorcycle battery is not factory sealed with electrolyte. This means the customer is responsible for filling the battery with electrolyte. This is a relatively simple thing to do, but if done incorrectly your battery could get damaged or you could get injured. Motorcycle batteries that are not filled with electrolyte, are referred to as “dry-charged” or “dry charge” batteries. The reason they are shipped dry charged is due to the fact that this gives them a longer shelf life (decades vs months) and it reduces the total price for the customer since the manufacture does not have to invest resources to fill, seal, and charge these motorcycle batteries which are much smaller than car batteries which will hold their charges for longer.
In this video we show you how simple it is to fill and charge the maintenance free Yuasa 12 volt motorcycle battery.
Always read the instructions provided by the battery manufacturer.
What you will need:
- Yuasa YTX14-BS dry charged lead-acid motorcycle battery
- Lead-acid motorcycle battery charger rated for small AGM 12 volt batteries
- Safety gloves
- Safety goggles
- Scissors (to cut electrolyte packaging)
- water or sink nearby
- Well ventilated, dry, cool area to work in and for safe overnight charging.
Note: During the first charge, the seal will be left loosely on which will allow for gassing. The release of gasses could be harmful if not done in a ventilated area.
Here we have the Yuasa YTX14-BS 12 volt battery. This battery is a sealed, maintenance-free, dry charge battery with an absorbed glass mat (AGM) separator and valve regulated vent system (VRLA). It has a capacity of 14Ah (amp hours) and 200 cold cranking amps (ccA) or 200A.
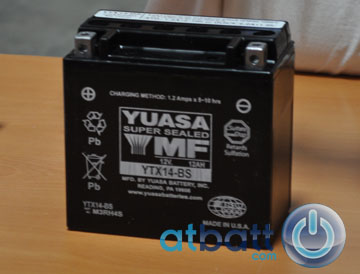
Before we begin make sure you have a clean, & dry well ventilated area to work in. Read all of the instructions provided by the manufacturer. You will need safety gloves, goggles, water close by and someone within yelling distance who can come to your aid in case of an injury.
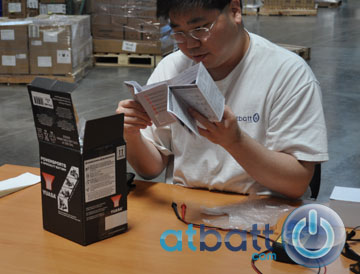
Unpack the battery and set the electrolyte solution aside. Since this is a 12V battery, there will be 6 cells to fill with the electrolyte solution. The plastic canister will have 6 tubes filled with electrolyte (1 for each cell).
The electrolyte is composed of sulfuric acid so be very careful handling it. If you get acid on yourself don’t panic. Just quickly wash water over any exposed areas. Never touch your eyes or mouth during this process especially if acid is on your hands.
Remove the protective seal covering the battery cells. Unwrap the electrolyte solution. You may need scissors to cut open the plastic bag. Carefully remove the cap on the canisters and set aside as this will become the cap for the battery cells. Do not puncture or remove the seals from the electrolyte canisters.
Carefully align the canister tubes with their corresponding cells. The seals will self puncture. Keep the canisters in an upright position and apply gentle downward pressure, slowly adding more pressure until all the seals are punctured. The canister should be even and self supported. The solution will immediately start to dispense in the cells at a relatively even rate. You may need to lightly tap the top of the canister to help get it started.
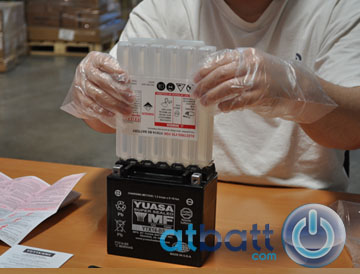
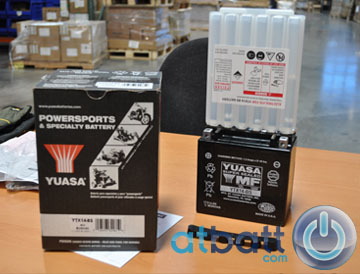
You will see air bubbles in the tubes as it empties. Do not try to rush this process or shake the canisters. It may take 15 to 20 minutes for the canisters to empty completely.
You may need to gently rock the canister back and forth to make sure all the solution is dispensed. Once the the electrolyte solution is completely emptied into the cells, you can carefully remove the canister and dispose of correctly.
Absorb any spilled or excess acid from the battery and tops of cells with a dry paper towel.
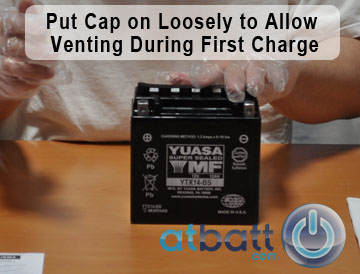
The canister cap now becomes the cap for the battery cells. Since we still need to charge the battery, it is important you only put the cap on loosely for the first time we charge it. This allows out-gassing and venting to take place during the first charge.
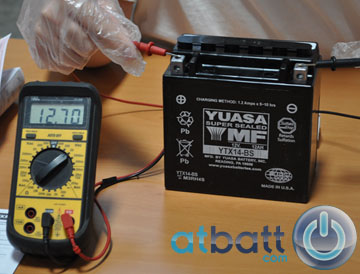
For demonstration purposes we use a voltmeter to check the charge of our battery after filling the acid. We get a reading of 12.7 volts. If we had tested the battery before we added the electrolyte solution, we would get a reading of 0 Volts because the battery would have no positive or negative.
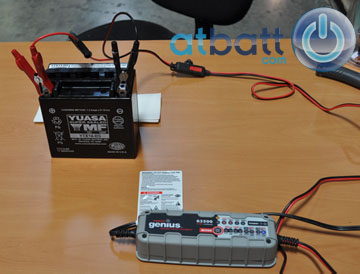
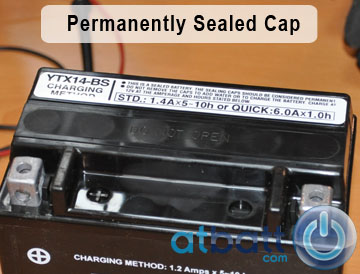
Before charging the battery, read the instructions on the box or the battery as it will tell you how fast and how much current you can use. The initial charge is the most important charge for this battery. This particular battery has a “standard charge” requirement of 1.4A x (for) 5-10hrs and a “quick charge” of 6.0A x (for) 1.0hrs. We want to use a slow charge for the first charge.
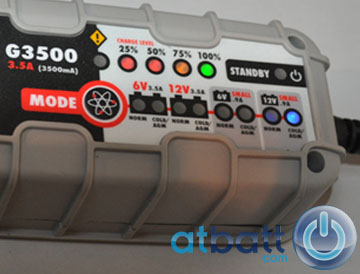
In our example we use a Noco Genius 3500 battery charger. We set the mode to “small 12V AGM battery” with a current of 0.9A. We will let it charge overnight.
Now that our battery is fully charged, we are ready to seal the cap. We can confirm the charge by testing our battery with a voltmeter. With the charger still connected to the battery we get a reading of 13.9. This reading will usually be between 13.8 and 14.2 if the charger has gone into float mode like ours has.
When we remove the charger we test our voltage again and we get a reading of 13.7 which indicates our battery is fully charged.
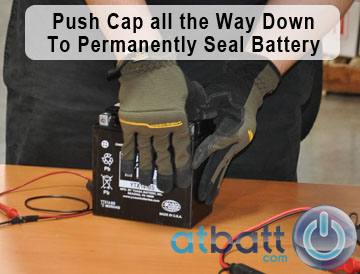
Now it’s time to push down the cap since we left it loosely on for the first charge. This may require some muscle to get the cap flat so that it is perfectly sealed.
Finally, you are ready to install the battery in your motorcycle or intended vehicle.
For best results use the battery immediately for 3 to 5 cycles before storing it for any duration. You should also use a trickle charger for continued maintenance of your battery when you are not using it.
We hope this video on filling and charging a dry charge motorcycle battery was useful for you. You can purchase this Yuasa battery and other brands on our motorcycle battery page.
Advantages of using a dry charge battery
There are several advantages to using a maintenance free dry charge motorcycle battery. These advantages include:
- Will not leak even if placed in non-upright position
- Resists shock and vibration
- Lower self-discharge rate
- No or minimal gassing during charging (meaning safer for enclosed applications with reduced ventilation)
- Maintenance-free, never needs filling after you have filled with electrolyte and sealed battery
- Due to even distribution of electrolyte, plates remain covered avoiding dry corrosion
Regularly inspect your battery for damage or cracks that could lead to electrolyte leakage requiring replacement of your battery.
At the end of the battery’s life cycle be sure to dispose of it properly by contacting your local waste management authority for disposal locations near you.
